
The default name servers will be used for all of the hosting accounts on your account. This is a two step process that requires first creating a new account, then modifying the DNS.
The following steps will guide you through the process:
- Step 1: Add a domain
- Step 2: Set the Default Name Servers
- Step 3: Register Name Servers with Registrar
Step 1: Add New Domain Name
To create a new account for the domain using the global private name servers:
- Log into Plesk.
- From the left-hand navigation menu, click Website & Domains
- From the top navigation menu, click Add Domain.
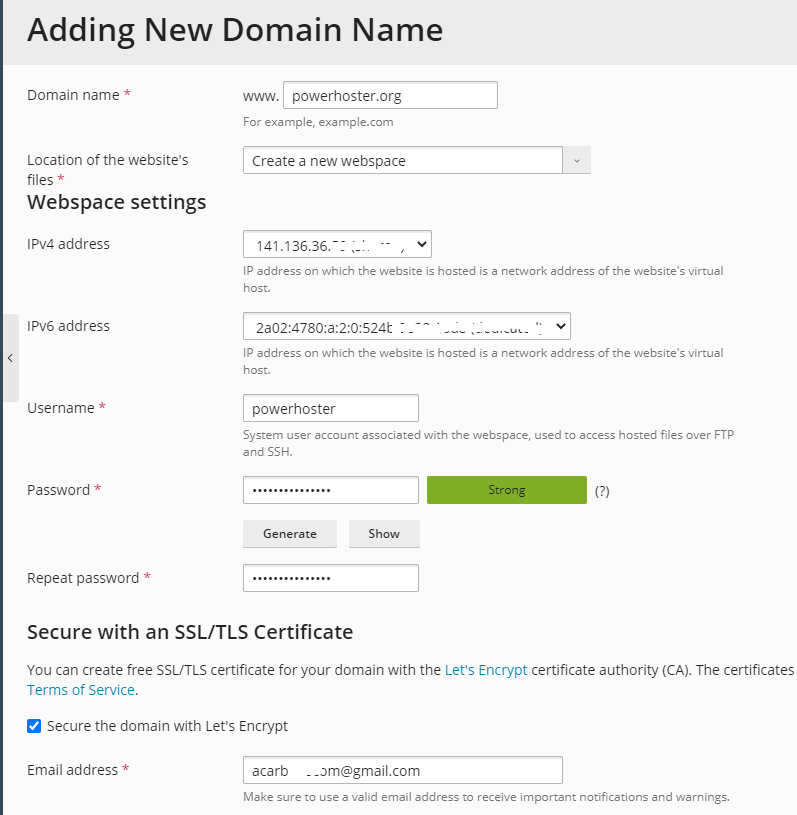
Complete the form as above. You need add your domain name, username, IP address, password.
When you add your domain, you can check the DNS Setting.
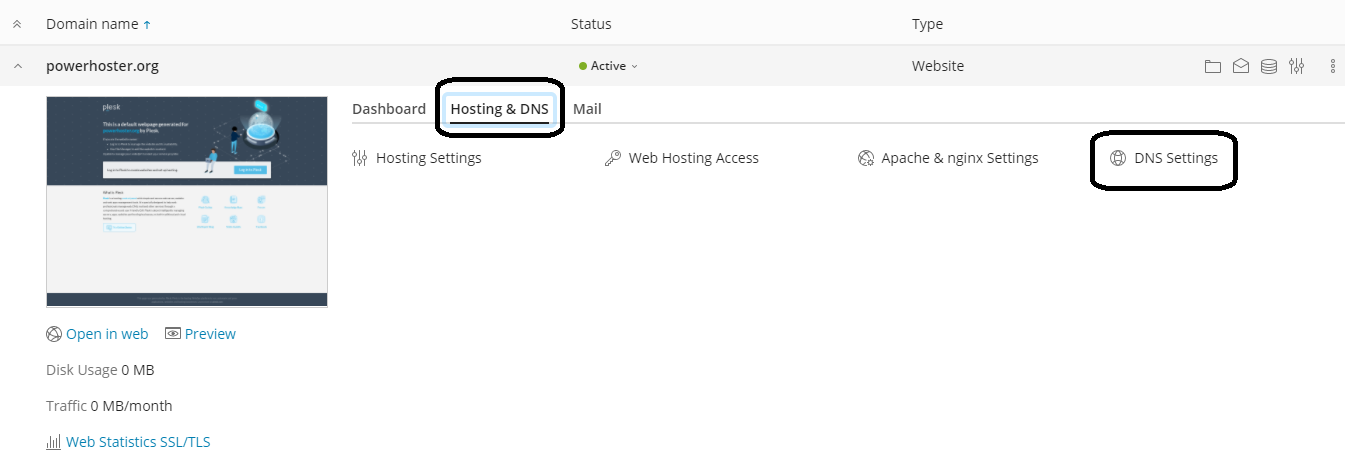 Click DNS Setting, you can find the DNS.
Step 2: Set the Default Name Servers
After the account has been created, the following steps should be taken to set the default name servers:
- Log into Plesk.
- Go to the Hosts Primary Domain or the domain you want to set private name servers for. There should already be a NS1 and NS2 listed here for that domain.
- To set the name server, click Add DNS Record from the top navigation menu.
The appropriate IP addresses can be found in the welcome email or by going to Home >Tools & Settings > IP Addresses in Plesk.
- Select record type A from the drop-down menu.
- In the Domain name box, type in ns1.
- In the IP address box enter primary IP address (as found in Welcome Email).
- Click OK.
- Set up the second name server by repeating steps 3-7, applying ns2 and ns2.domain.com where appropriate.
This generally takes 4-8 hours of propagation.
You should now have the following two DNS records set up for both name servers:
- A records – showing the IP address to which each is bound
- NS records – ns1.domain.com and ns2.domain.com (showing the actual domain name used)
Step 3: Register Name Servers with Registrar
After server configuration is complete, the next step is to visit the domain registrar to register the two name servers and point them to your domain. For further information on this process, please read the following article:
- Private Name Servers – Setup.
Once the name servers are registered, each domain that gets set up on the server will have ns1.example.com and ns2.example.com as name servers. You can give this to you
The default name servers will be used for all of the hosting accounts on your account. This is a two step process that requires first creating a new a
[See the full post at: How to Set your Server’s Name Servers by Plesk Control Panel ?]
How to Set your Server’s Name Servers by Plesk Control Panel ?
No related posts.
No related posts.